Archive for March 2016

Mandy Bakes: Coconut Easter Nests

No Comments »

Easter is just around the corner, and if you're thinking of putting in a tiny bit more effort in your Easter gifts but you're a little skills-challenged in the kitchen , you've come to the right person. Here's an adorable yet simple recipe for coconut Easter nests! Read on for more. 

Ingredients (makes 18)


  • 3 Egg whites
  • 1/4 cup Caster sugar
  • 200 g or about 2 cups of unsweetened desiccated coconut.
  • Any kind of chocolate spread. I used a dark chocolate vegan spread from DM which is DABOMB but Nutella would also be good. (optional)
  • Tiny chocolate eggs (I used two packs of Kinder Mini Eggs)
  • Food colouring (optional)

Method

  1. Preheat oven to 150 degrees Celsius.
  2. While slowly adding caster sugar to egg whites, whip egg whites with an electric mixer until soft peaks form. When I say soft peaks I mean up to the point where it's just not runny, but when you turn the mixer upside down, the bit of egg white on the mixer softly droops down. I just think it adds a tiny bit more chewiness, but if you don't have a mixer just mix the sugar and egg whites until the sugar more or less is dissolved. No need for meringues. 
  3. Add the coconut to the egg white mixture and mix well. 
  4. Add a few small drops of food colouring if you want them to have a festive pastel colour, but this is completely up to you. I wouldn't recommend red, like I used here for a third of my batch, because it starts to look a little burnt when baking. 
  5. Pack about 2-3 teaspoons of the coconut mixture into small muffin tins or silicone covers. If you're using muffin tins, make sure to grease them with some butter or oil to prevent the nests from sticking. If you're using silicone muffin covers, no need for that.
  6. Press down gently with your fingers and make an indent in the middle, for where the chocolate eggs will lie. 
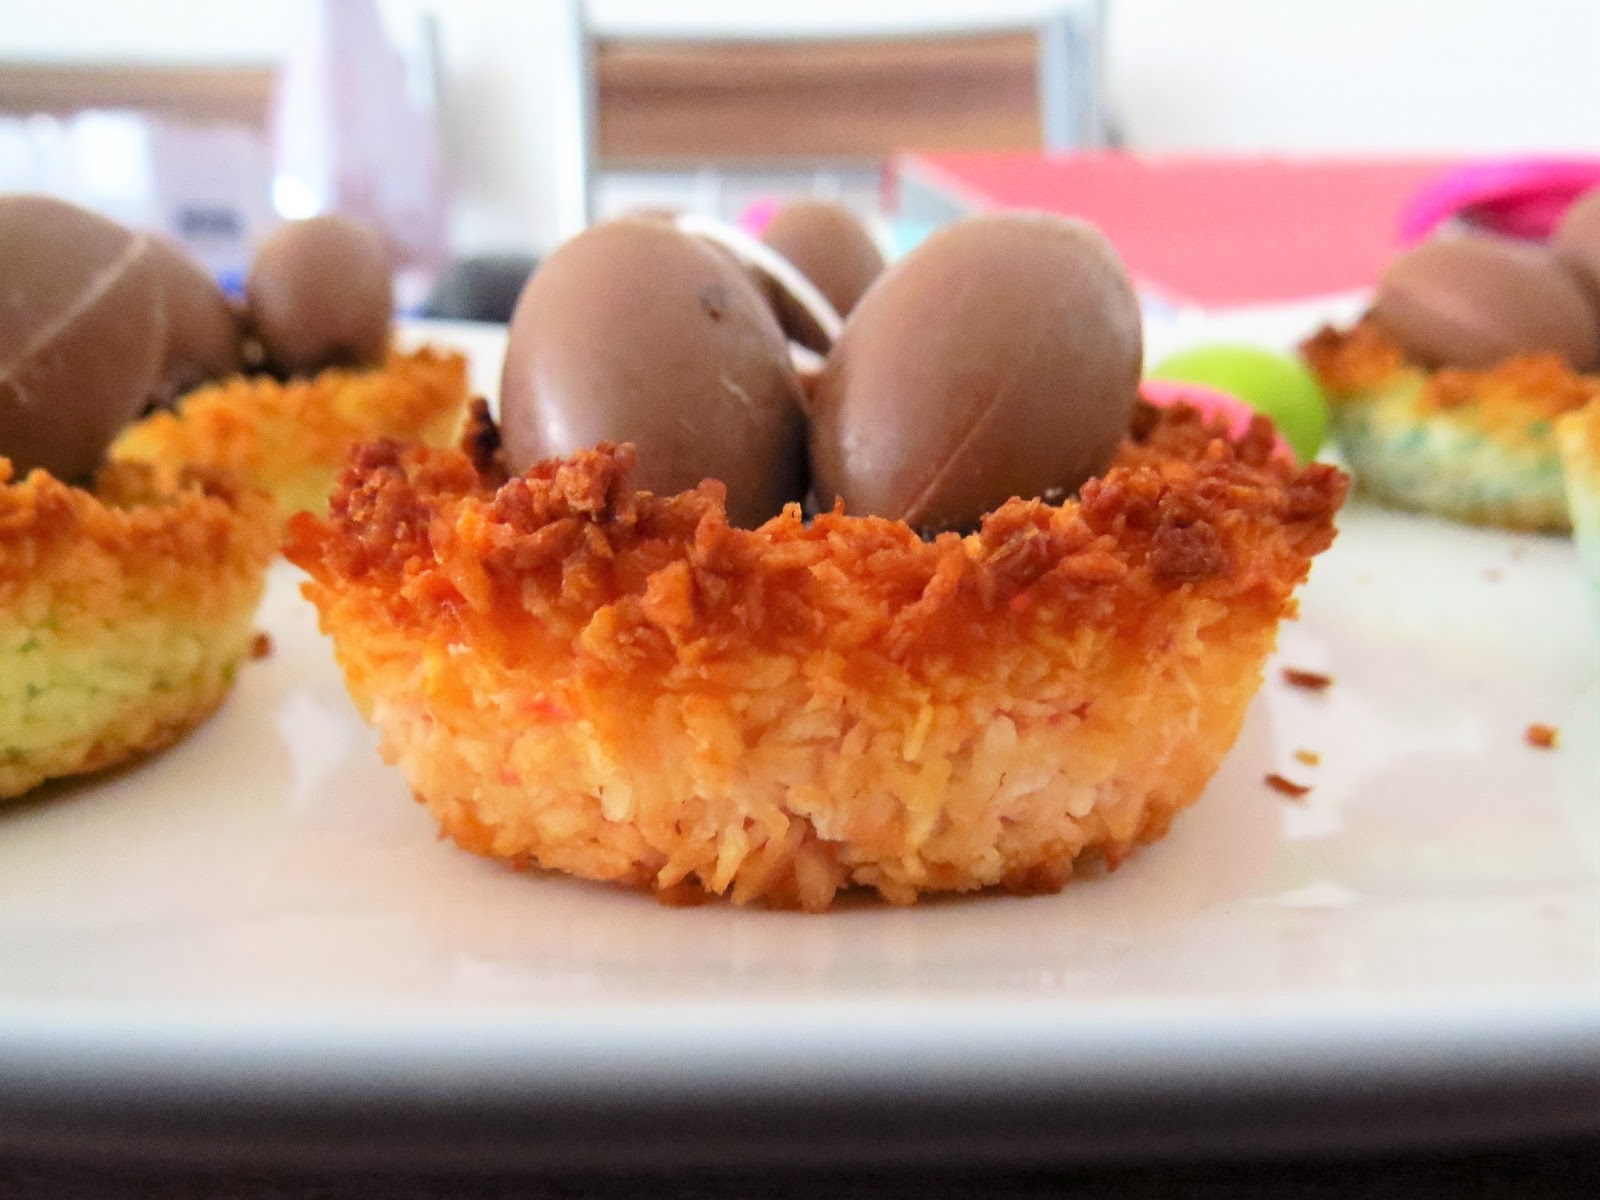
  7. Bake for about 25 minutes, or until the tops are a nice golden brown, like below. 
  8. Let cool for a few minutes, until the nests feel cool to the touch. 
  9. Spread a little chocolate spread in the middle where you're going to place the eggs.  This is optional if you're going to be serving them at home, but I'm going to be giving these as gifts so I didn't want the eggs to fly around while being transported. 
  10. Stick the chocolate eggs on top of the spread! 


 Add some Easter decorations on the plate to jazz things up if you're having these at home!
 If not, line an Easter-themed box with some baking paper and pack your beautiful edible nests inside!

Have a good Easter break everyone! 

Berlin Bites: Aroma

No Comments »

Remember the last Chinese restaurant I went to where I said had the most decent (note, I didn't say best) Dimsum in Berlin? Yeah, forget everything I said. THIS place right here, Aroma, down by the intersection of Wielandstrasse and Kantstrasse in the Charlottenburg region has got me hopeful about the Dimsum scene in Berlin again. I've been hearing a lot of talk that the Charlottenburg region is where it's at for authentic Chinese food, and boy they weren't kidding. The concentration of Asian restaurants just on Kantstrasse would make you wonder if you'd wandered into Chinatown. Side note; there's a little Taiwanese place on the way to Aroma that apparently also does Dimsum. That's next on my To-Try list, but if you know which restaurant I'm talking about drop me a line to let me know if I'm wasting my time or not. 

Anyway, on to really what you want to look at which is pictures of the food. The two of us ordered about 5 Longs of Dimsum and among them were of course the classics, like (from top left anti-clockwise) Ha Gao, Siew Mai and Xiao Long Bao. I'm happy to report they were definitely on point. I've heard some rumours that some of the Dimsum might be pre-packaged frozen food, but the ones we ordered were mostly from the 'Home-made' section of the menu and to be honest, I couldn't tell the difference. Like I've said before, it doesn't compare to the best Dimsum I've had in Singapore (or even London), but so far, it's probably the best I've had in Germany. 
This. This down here made my stomach so happy. To Dimsum aficionados, you probably recognise this as Cheong Fan, one of my personal favourites and really hard to find here in Berlin. On the menu it's listed as Reisblätterrollen mit Garnellen. So Cheong Fan lovers, you're welcome.
And of course, who can forget dessert! Also v.v.v. ecstatic that they had Lian Yong Bao (Lotus Paste Buns) and there were even bits of egg yolk inside. Look at that sexy filling. It's so beautiful, it brings tears to my eyes. 
I don't have much to say about service, I've heard people complaining about the service on Yelp, but to be honest they just seemed like typical Asian Restaurant service. Quick, not overly chatty but also not rude like people made it out to be. I would say it was even above average because the waiter was polite and asked us how our food was at the end of the meal. It could be different around peak times, I can't make any guarantees, but don't get your panties into a twist if the servers aren't as friendly as you're used to, lower your expectations and you'll get along just fine. 

Great place to bring big groups because there are plenty of seats too, but call ahead if you're going to go during peak hours. 

Address:  Kantstraße 35, nearest S-Bahn Station Savigny Platz
Opening Hours: 12pm - 3am every day

Mandy goes Meatless: Lentil 'meat'balls

No Comments »

In case you were wondering, yes, I am still doing the whole meatless lunches thing. In fact,  I even managed to extend this to the weekends last week, even though we were eating out in Lübeck, so, pat on the back for me, look out world, I will definitely be feeling like I am better than you this week. I haven't been completely creative with the recipes thus far, sometimes just cooking noodles with eggs, but I thought I'd share this recipe for lentil 'meat'balls because the texture is pretty damn good, for a meatless meatball. I mean, it's no Ikea Kottbuller, that's for sure, but it ain't half bad, especially with some pasta or cheese. If you'd like to check out how to make them, take a look at the recipe below! 

Ingredients (5 portions or 25 balls)

  • 1 cup of green or brown lentils
  • A handful of vegetables of your choice. I chose brussels sprouts, but any leafy vegetable would also work pretty well. 
  • 1/4 cup Parmesan cheese 
  • 2/3 cup breadcrumbs, or paniermehl would also work fine (which is what I used)
  • A pinch each of  thyme, oregano, basil and rosemary.
  • 1/4 tsp salt
  • 1/4 tsp black pepper 
  • Lots of water (to cook the lentils) 
  • 3 shallots
  • 3 cloves of garlic

Method

  1. First, cook the lentils in lots of water, according to package instructions or as a rough guide, I use around 1L of water to a cup of lentils. To do so, heat on high heat until water is boiling, then turn down to a simmer and simmer for about 25-35 minutes or until lentils are soft (do a taste test! Although they're pretty nasty just boiled :p).
  2. Drain the lentils of water and leave to cool. In the meantime, grate Parmesan cheese and roughly (or finely, if you don't like the sight of green) chop the vegetables and shallots. Also preheat oven to approximately 180 degrees Celsius.
  3. Fry shallots and garlic until shallots turn slightly transparent.
  4. Once lentils are cool, place in a food processor and blend until it has the mushy consistency of minced meat. (see photo below) If you don't have a food processor (like me), some other alternatives are to use a smoothie machine (what I did) or to mash it by hand with a fork. If you're using a smoothie maker, make sure to add a tiny bit of water to ensure smooth blending. If you use this method and your lentils turn out too watery, use a sieve to get rid of excess water, or cornflour. Don't worry too much about wateriness, the breadcrumbs will help to absorb some of the moisture anyway. 
  5. Throw everything else in and mix well!
  6. Shape the mixture into approximately 2cm balls, or to your preference. Lay them on baking sheet. 
  7. Bake in the oven for approximately 25-35 minutes, or if tops of lentil balls are golden brown. 
And there you have it! You can have these lentil-balls with a tomato-based pasta sauce (my personal favourite, pesto sauce (also good).

Alternatively,bake them with potatoes in a cream-based sauce. I am way too lazy to make another post for it, so I'm just going to insert another recipe in this post. First, choose 3 small potatoes (by small I mean like, new potato small, ya dig?), peel the skin and slice them into thin slices as seen below. Cover the bottom of a small container (I used a small silicon loaf mold that I got from Daiso)  with the sliced potatoes.
To make things easier, use a pre-made packet sauce. I recommend this cheesy pasta sauce from Knorr, and for one serving I used approximately half the pack.
 Lay the meatballs on top of the potatoes, and then pour the cream/cheese sauce over.
Add some more cheese! Now you may be thinking, hold up Amanda, isn't this a little too much cheese in one meal? To which I say, YOU CAN NEVER HAVE TOO MUCH CHEESE! I used 1/4 cup of Parmesan and a slice of Fol Epi cheese here.
 Bake at 200 degrees Celsius for 15 minutes.
 Dig in to an incredibly decadent, cheesy meal!