Xmas Project #4: Lebkuchen Biscuit Box

No Comments »

I've been wanting to try making a biscuit box ever since that episode on The Great British Bake Off (where 99% of my inspiration comes from), and I've finally done it! Granted, execution leaves much to be desired, but I'm pretty happy with one or two things, like how the holly leaves came out. The box is made out of Lebkuchen, which simply put, is kind of like the German version of gingerbread, but the dark colour is achieved with rye flour instead of molasses, and honey gives it it's chewy, sticky consistency. 
I tried to keep this simple-ish by limiting it to two types of piping tips, a leaf tip and a small round tip, but who are we kidding, this was a pretty monumental task, especially since we all know how bad I am at piping in general. I won't go into too much detail on how to pipe the decorations because I'm a terrible teacher, so here are some videos instead. 

Border Tutorial: https://www.youtube.com/watch?v=OPX1YlHuU-4 (I used two types of borders from the 8 given here, a ripple border for the top of the box, and a combination of a ripple border and swag border) 

For the Christmas Wreaths, I didn't find a good tutorial, so I just kind of winged it by piping individual layers of leaves in a circle, then layering it with more leaves to make it look more like a wreath, and then I just topped it with some holly berries. 
I wanted to make things more organised, so I piped the holly leaves and Christmas wreaths on baking paper before hand and let them dry completely (at least overnight), and then stored them in plastic containers. When the Lebkuchen was done, I just piped some royal icing behind them and stuck them on the sides. It worked perfectly for the holly leaves, but the wreaths were extremely fragile and some of them broke along the way, so if you don't want them to crack (like the one below), maybe practice piping them on baking paper first, and then pipe them directly on the Lebkuchen box. 
I also didn't want to use fresh royal icing since it wasn't going to be eaten immediately, and I'm a bit paranoid about uncooked egg whites, so I just got some pre-made royal icing at Cakeville. Quick shout out to Cakeville for having like, literally all your baking needs. Seriously, if you're ever missing something you need for baking, you need to check this place out. Plus prices are quite reasonable. It's not cheap, but for stuff that's practically impossible to find in regular German supermarkets, it's not exorbitant either. If you want to check this place out, it's on Wörther Str. 23, in the Prenzlauer Allee region.
 Also got some edible glitter there to make things even more festive. 

So on to the actual recipe! 

Ingredients


  • 300 g rye flour (Roggenmehl, or type 1150. Don't get Roggenmehl Vollkorn, that's for bread and contains little bits of grain in them, but get Dunkles Roggenmehl)
  • 180 g brown sugar (or Rohzucker)
  • 10 g cinnamon
  • 10 g baking soda
  • 20 g Lebkuchen spice (or, if you don't have it like I did, improvise with ground ginger, nutmeg and plenty of cinammon. Cloves and ground coriander would be ideal, but how many of us have that well-stocked of a spice pantry hmm?) 
  • 2 eggs
  • 80 g honey 

Method

  1. Mix eggs, sugar and honey in one bowl, and flour, baking soda and spices in another. 
  2. Slowly mix the dry ingredients into the wet, until they come together to form a dough. 
  3. Knead a little more to ensure ingredients are evenly distributed, then wrap in cling wrap and leave in the fridge for at least 3 hours, or overnight. 
  4. Take out of fridge and roll into thickness you desire. I personally think I could have gone thinner, but these were such a bitch to roll out because the honey made the dough incredibly sticky. 
  5. Cut into 6 pieces: the top, which should be slight bigger than the bottom, and two of the sides should be longer than the bottom, to allow for overlapping. Unfortunately, I wasn't neat enough with my measurements and they came out a bit wonky, which explains the messiness of the box overall 
  6. (Optional since I didn't do this step, but I think it would help) My pieces turned out a little too puffy for my liking, so I think ideally, one should make a few shallow holes with a fork evenly throughout the dough after you've rolled it out to let some air escape. 
  7. Bake for 15 minutes at 170 degrees Celsius. I opted to make mine a little more crispy to ensure the dough would hold up during construction. 
  8. Leave to cool completely. 
  9. Pipe ripple and swag borders on each side, then leave to dry completely. 
  10. Pipe a thin line of royal icing on each side, and join the pieces together (except for the top).
  11. Leave to dry completely
  12. (optional) To hide the icing that you used as a glue, pipe a simple border on the corners to cover it. I just piped little round mounds. 
  13. Fill with cookies from Xmas Projects #1, #2 and #3!


That's it for my epic Christmas baking journey! Happy holidays everyone!❆❅❉ *<]:{)❆❅❉

Xmas Project #3: Gluten-free Snowball Macaroons

No Comments »

This one is for the gluten-sensitive out there, or if you just love coconut like I do. These are super easy to make, and perfect for this time of the year because they look like little snowballs! Well, if you didn't toast them as much as I did anyway.

 Ingredients


  • 1.5 cups shredded coconut
  • 2 egg whites
  • 0.25 cups caster sugar (Alternatively, replace with honey or agave nectar if you want to go sugar free) 
  • pinch of salt 
  • Bittersweet chocolate 
  • splash of milk

Method

  1. Whip egg whites and salt with an electric mixer, adding sugar slowly until mixture becomes frothy. If you want more of a meringue consistency to the macaroons, whip until stiff peaks form. If not, leave it frothy. 
  2. Add coconut to mixture.
  3. Take walnut sized pieces and roll into balls. 
  4. Bake for 12 minutes on 180 degrees Celsius (fan assisted)
  5. Leave to cool for at least half an hour.
  6. Melt chocolate on very low heat with a splash of milk . 
  7. Dip macaroons in chocolate and leave on baking paper for chocolate to harden. Alternatively, you can drizzle chocolate over the macaroons in a zig-zag motion. 
And that's it! One of the easier recipes in this bunch, and very yummy, although fair warning, it will be extremely sweet if your coconut shreds are already sweetened, so try to get unsweetened coconut if you can. 


Xmas Project #2: Tea Bag Shortbread Biscuits

No Comments »

I made these a while back ago, but they seemed to pretty well-received so I thought they'd make good Christmas presents too. You can jazz it up and use strings in festive colours to tie the cookies up with, so they really look like tea bags. I made these with Earl Grey Tea leaves, but these would work well with any type of strongly flavoured, loose tea (I recommend black teas over any others because the smokiness really goes well with the shortbread) 
Nothing goes better with tea biscuits than actual tea. 

Ingredients

  • 3 tbsp Earl Grey tea leaves (either get loose ones, or just open up an actual tea bag!)
  • 2.5 cups all-purpose flour (Weizenmehl)
  • 1 cup butter, softened to room temperature
  • 0.5 cup caster sugar (finely milled white sugar)
  • 1 egg yolk
  • 1/4 tsp salt
  • 1 pack vanilla sugar (or 1-2 tsp vanilla extract)
  • Bittersweet chocolate, 100g (optional)
  • Some sort of string 

Method

  1. Cream butter and sugar together until pale and fluffy, then mix in tea leaves
  2. Mix egg yolk into wet batter.
  3. Add rest of the dry ingredients (flour, salt) into the wet batter and mix until it comes together to form a smooth biscuit dough (I recommend using your hands for this)
  4. Wrap in cling film and leave in fridge to rest for at least an hour (or overnight) 
  5. Roll out dough into approximately the thickness you want for the biscuits (maybe 0.5 cm? )
  6. If you have a square or triangular cookie cutter, this will be really easy. Just use the cookie cutter and then cut the edges to form a tea bag shape as seen above. If not, you can do what I did and make a template yourself, and cut the biscuits out by hand one by one. (This takes forever, so have patience!) 
  7. Poke a hole in the top of the triangular peak with a chopstick, a toothpick, or whatever you have on hand. 
  8. Preheat your oven to 180 degrees Celsius (fan assisted, if not then 200)
  9. Bake cookies for 15 minutes, then once done, leave to cool.
  10. This part is optional, but if you want to dip it in chocolate , then melt the chocolate over low heat with a splash of milk or a tiny dollop of butter, then dip the cookies into the chocolate and leave to cool until it hardens. (I put mine in the fridge to speed things up)
  11. Tie the string through the hole you made in the biscuits. 
And that's it! These are so addictive to munch on, you might be tempted to just keep them all for yourself and enjoy them with a cuppa and a view. ʕ•ᴥ•ʔ


Xmas Project #1: Candy Cane Cookies

No Comments »

It's almost Christmas time, and this year I've got an idea. I have a four (maybe five) part special planned on biscuit recipes to make for that someone in your life with a sweet tooth! Why biscuits? Well, they're the perfect bakes to give as presents, they're relatively easy to make, you don't have to worry about getting a perfect rise, you can make them ahead of time and they won't go bad (or you can freeze the dough and bake the cookies when the day comes) and they're fuss-free to package. 
The first part of this Christmas special involves a recipe that's maybe a little bit kitsch, but hey, what's Christmas if not kitsch-y, eh? 


These are chocolate and vanilla candy-cane cookies. You can of course, replace the chocolate bit with peppermint flavouring and red food gel colouring to get a traditional candy cane colour, but I personally am not a fan of peppermint in cookies, so I went with chocolate instead. The only problem with incorporating cocoa into a biscuit recipe is that it changes the consistency of the dough quite a bit. I was going for an intense cocoa flavour, so I put half a cup of unsweetened cocoa powder to 1 cup of all purpose flour, which was a big mistake. The chocolate cookie dough came out a bit too crumbly without the extra gluten in the flour to hold it together, so I've revised the ratio to about 1:5 cocoa powder to flour. That should work better in keeping the dough from crumbling when you're twisting it around. 

Ingredients

  • 1 egg
  • 1.5 cups all purpose flour (or type 405 Weizenmehl in Germany) (for the white parts)
  • 1.25 cups all purpose flour (for the chocolate parts)
  • 0.25 cups unsweetened cocoa powder
  • 0.5 tsp salt 
  • 1 pack vanilla sugar (or 1 tsp vanilla extract/flavouring)
  • 1 cup butter, softened 
  • 1 cup powdered sugar

Method

  1. Cream powdered sugar and butter together until pale and fluffy. 
  2. Add egg, vanilla sugar and salt and mix until incorporated.
  3. Divide batter into two. 
  4. Add flour to one batter, and flour/cocoa powder mix to the other batter.
  5. Mix both until smooth cookie dough is formed. (I recommend using your hands for this bit)
  6. Wrap with cling wrap and refrigerate for at least an hour or more. 
  7. Once ready to bake, preheat oven to 190 degrees Celsius.
  8. Take walnut sized amount of both white and chocolate parts, roll each into a long strings, pinch ends together and then twist together to form pattern of the candy cane. 
  9. Continue until all batter is used up. 
  10. Bake for 10-12 minutes, then leave to cool completely. 


Et voila! After you're done with the cookies, you can package them in little plastic bags and tie them up with a nice ribbon, as seen below, and give them to friends, relatives, hey, maybe even make amends this holiday and give them to your enemies. This package below is for a friend, but I've kept a few extras for an extra special present that will be featured at the end of this Christmas series, so stay tuned for updates! 

Berlin Bites: Udon Kobo Ishin

No Comments »

THE SEMESTER IS OVER AND SOMEHOW I SURVIVED??! This post is long overdue because these photos were taken MONTHS ago but it's probably perfect for now because it's starting to get cold again (although it's uncharacteristically warm for December, no? Global warming anyone? )
So I finally found a great udon place. It's not that cheap, but if you have a plain udon without too many toppings you could get a bowl for about 6.80 euros.  I don't think there's too much to say about it, this photo pretty much sums everything up. LOOK AT THE SIZE OF THAT BOWL! It's bigger than my head!I definitely recommend the Niku Udon over the plain udon broth, the plain one was for me too watery and flavourless, but the Niku was great. Full of umami, steaming hot, great , chewy udon, can't ask for more. 
Side note, this place serves Calpico! For the uninitiated, it's a probiotic drink similar to Yakult, but I personally like the taste better. Also, there are a couple of really innovative udons featuring carbonara sauce  on the menu that I haven't tried yet, but definitely intrigued me. 

You can find Udon Kobo Ishin in the region around Hackescher Markt, so it's great if you're going to the Museum Insel for a visit! Don't confuse it with another Japanese restaurant also called Ishin though, because you're not going to find udon at the other place (as far as I know).

Address: Litfaß-Platz 1, nearest S-bahn Hackescher Markt. 
Opening Hours: 12:30 - 9:30 pm every day except Sunday, 5:30 - 9:30 pm


Mandy Bakes: Chapalang Quiche

No Comments »

It's deadline time again, and we all know what that means! More writing on the blog to procrastinate from the ever growing pile of work I have to do, and then having a mental breakdown as I struggle to finish everything on time! Yay! On today's procrastination post, we have a recipe for 'chapalang' quiche. For the uninitiated, 'chapalang' is Singlish for 'a mix of everything' (see synonym: rojak). Basically, this is me trying to use up a random mix of items in my pantry before they go bad by throwing them into a quiche. The recipe is relatively straight forward, especially if you use store bought pastry dough, but me being me, I like to waste precious time I could be using to write my policy paper on pastry dough. So, on with the recipe! ༼ つ ◕_◕ ༽つ

Ingredients (Serves about 4-5)

(Disclaimer: I'm using US measurements here because I have yet to buy a kitchen scale and can only base things off of my measuring cups)

For the Pastry Dough: 


  • 1.5 cups of plain flour (or type 405 Weizenmehl in Germany) 
  • 4 tbsps of chilled butter (DO NOT melt)
  • 0.5 tsp of salt
  • approx 3-4 tbsps of cold water 

For the Filling:

  • 6 eggs
  • 1.5 cups of milk
  • 0.5 tsp of salt 
  • 0.5 tsp of pepper 
  • 0.25 cups of parmigiano reggiano
  • 1 cup of any other cheese, e.g. chedder or swiss cheese. I used swiss cheese here. 
  • Any filling you want! I used here dried tomatoes, smoked salmon and chicken breast ham

Method: 

  1. Prepare the pastry dough first. Sift flour and salt together.
  2. Rub chilled butter and flour together using your fingertips, until the flour has the consistency of wet sand. 
  3. Add a tablespoon of water to the dough and continue mixing, adding in more water until the dough comes together. 
  4. Wrap in cling film and leave to rest in the fridge for at least an hour. In the meantime, prepare the filling. 
  5. Whisk eggs, milk, salt and pepper together. (that's pretty much it for fillings. I told you it was straightforward)
  6. Preheat oven to 190 degrees Celsius. 
  7. Once dough has been in the fridge for 30 minutes, take it out, roll it out thinly and cover your tart tin with it, pressing dough into edges. (Due to my appalling lack of proper baking equipment, I had to resort to using a loaf tin)
  8. Put baking paper over the tin and pour some baking beans (or rice, or regular dried beans) over the baking paper and blind bake your crust for 20 minutes. Then, remove the baking paper and baking beans and bake for another 5 minutes. 
  9. Turn down oven to 160 degrees Celsius, place cheese, salmon, tomatoes etc., in the bottom of the quiche shell and then pour egg mixture over it. Bake for 50 minutes (depending on what tin you use really), then leave to cool for another 10-15 minutes before serving. 

 You can always trim the edges to make it look fancier if you're serving guests! If not, devour on sight. 
I was a little too eager and did not wait for the quiche to cool before I served, resulting in this gooey mess here but oh well. Really easy to make, and great for those cold winter days when you want something hearty to fill you up!

Berlin Bites: Pacifico

No Comments »

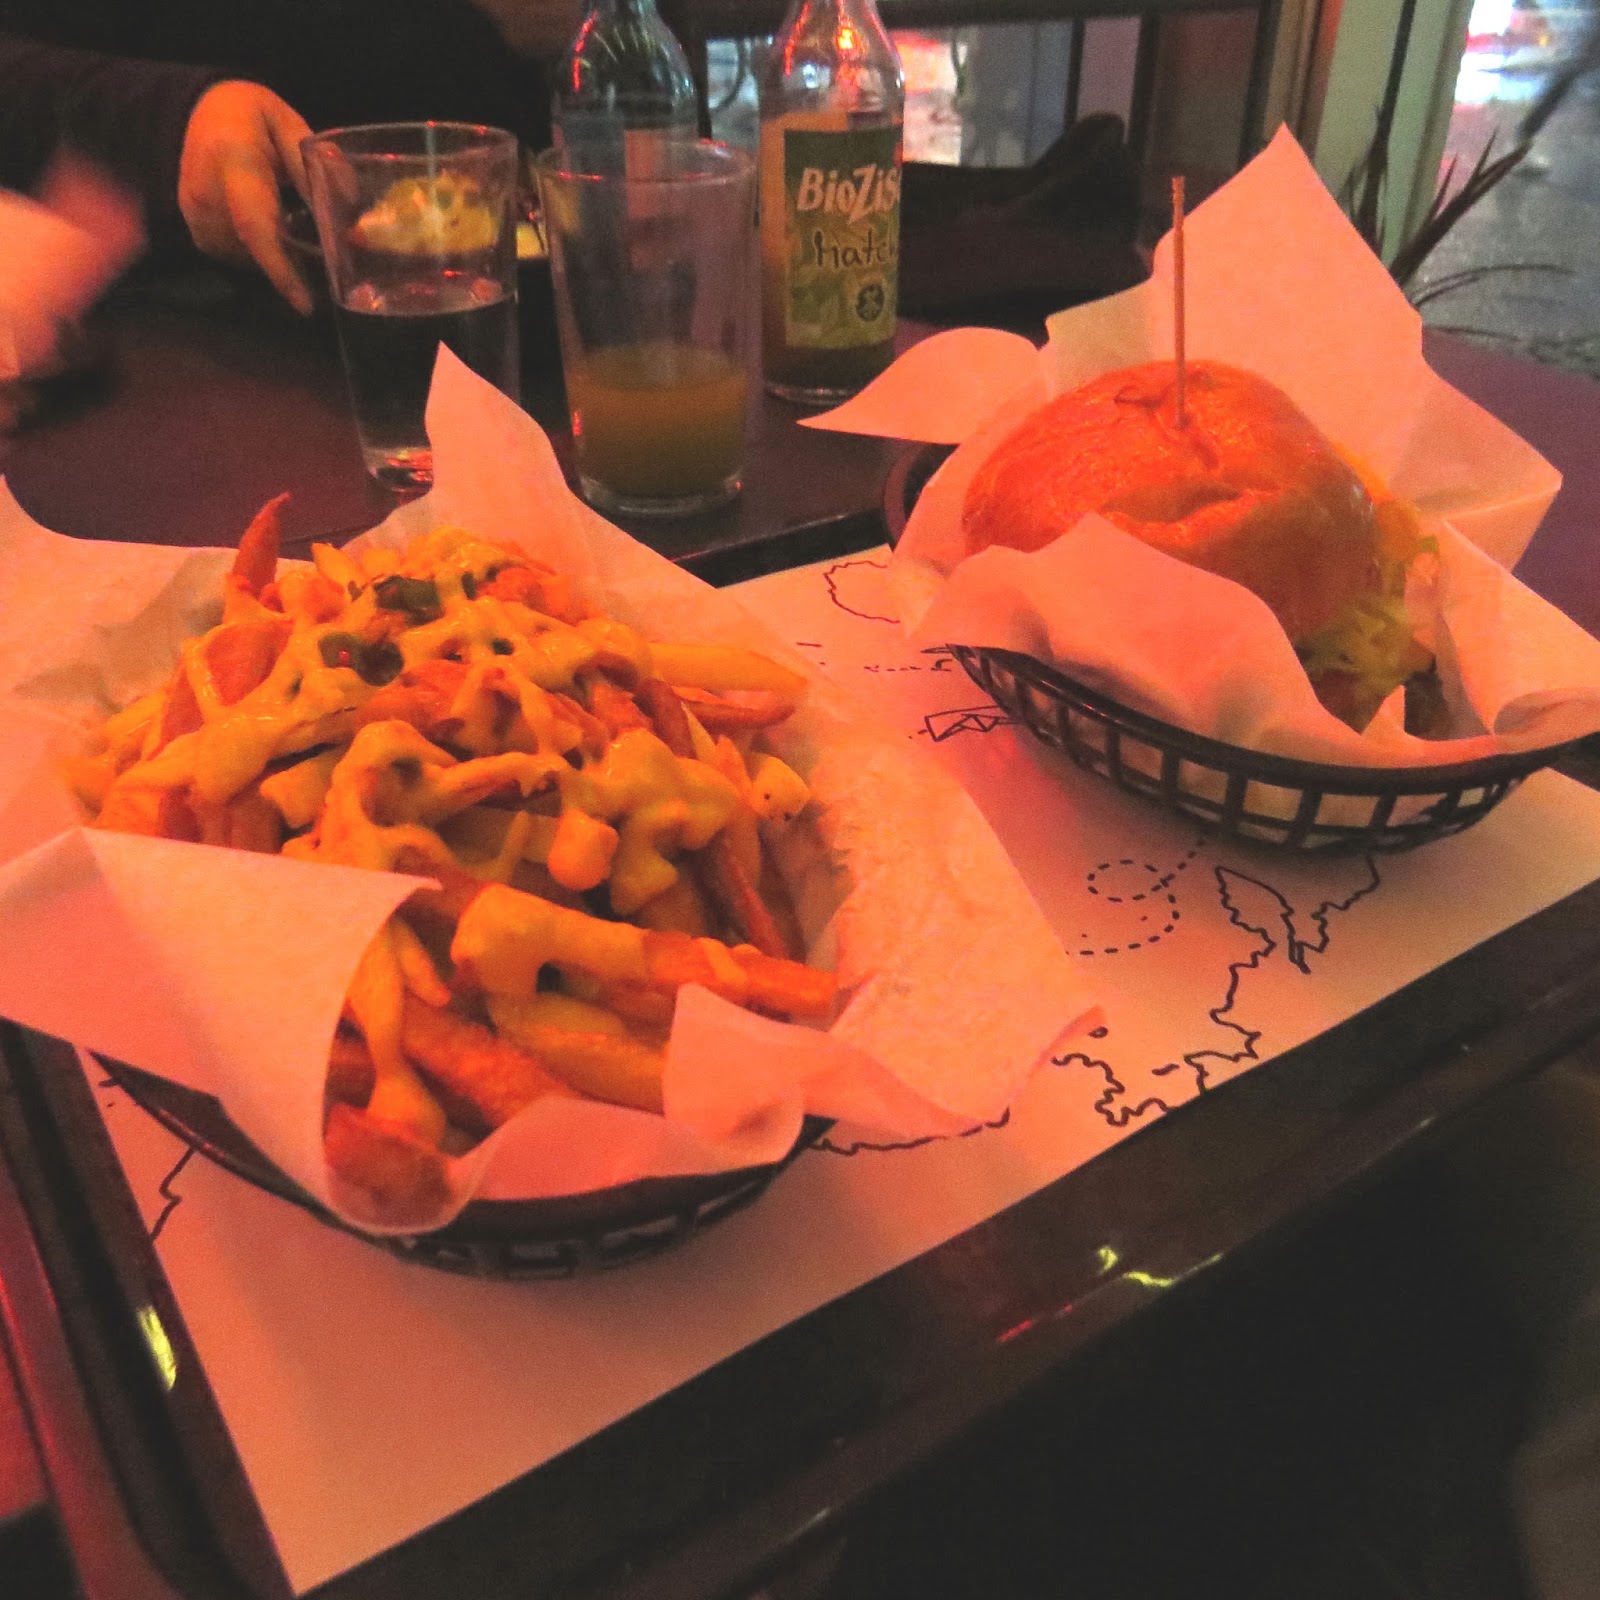
DISCLAIMER: You may get eye cancer from the following photos because they are pretty bad quality. Apologies for the shitty quality, but the restaurant/bar had this typical 'ambient' lighting (read: dark) so...deal with it. ¯\(°_o)/¯

Anyway, on to the important bit. Pacifico is a Korean-Californian fusion restaurant located in the region of Moritzplatz (it's actually right near the exit of the U-bahn so, pretty convenient). I came here with my family when they were visiting, so there was the opportunity to try out more things on the menu. The menu isn't super extensive and is limited to burgers, 'taco' buns and bibimbap (Korean rice bowls), but my god, do they do them well. Their burgers are by far the most BOMB-DIGGITY creations I've ever had. The buns are extremely butter and soft, and the patty cooked to a perfect medium/ medium rare. My brother had the OC burger, not complicated, no extra kimchi or any other ingredients. Just a good ol' regular burger. 
We also ordered the Kimchi fries to share, which was insanely delicious. I love the combination of sweet potato fries, regular fries and kimchi mayo. My only complaint? Too little sweet potato fries! I love those little suckers. 
 My pick for the night was their 'Chinese Cheater'. For the Singaporeans/ Malaysians out there, you might be familiar with the concept of a Kong Ba Pau. The bun here is very similar to that, but larger and stuffed with crispy duck, coriander, cucumber and hoisin sauce. Love x infinity the combination of crispy duck and coriander. Mmmm. Might need to consider cooking this as a dish at home. 
My parents went for a traditional bibimbap bowl (because they are boring lulz sorry mom) which was also pretty good. Never been a big bibimbap fan so I can't comment on whether it's delicious or not, but it definitely wasn't bad. 
All in all, Pacifico gets five stars from me. Great food, at a great value! The buns and burgers cost around 5-7 euros, which in my opinion is a steal. Take note that they only accept cash here!

UPDATE: Came here again for Lunch today, the Kimcheezy burger is DABOMB. My new favourite burger in Berlin. Also, new tip, if you top up your buger by 2.50 you can get Angus beef!

Address: Oranienstr. 147, Berlin, nearest U-bahn Moritzplatz
Opening Hours: Mon - Sat, 12:00 to 24:00, closed on Sundays